Welcome to the Craftsman Garage Door Opener Manual‚ your comprehensive guide to installing‚ operating‚ and maintaining your garage door opener. This manual provides essential safety tips‚ step-by-step installation instructions‚ and troubleshooting solutions to ensure smooth operation. Designed for both new and experienced users‚ it covers programmable remotes‚ smart features‚ and maintenance routines to keep your system running efficiently. Refer to this manual for optimal performance and to address any issues promptly.
1.1 Importance of the Manual for Proper Usage
The Craftsman Garage Door Opener Manual is essential for ensuring safe‚ efficient‚ and proper operation of your garage door opener. It provides detailed instructions for installation‚ programming‚ and maintenance‚ helping you avoid potential hazards and system damage. By following the manual‚ you can optimize performance‚ troubleshoot common issues‚ and extend the lifespan of your opener. The guide also outlines critical safety precautions to prevent accidents‚ making it a vital resource for both new and experienced users. Refer to the manual regularly to ensure compliance with manufacturer recommendations and maintain your garage door opener in top condition.
1.2 Overview of the Craftsman Garage Door Opener Models
Craftsman offers a diverse range of garage door opener models designed to meet various needs and preferences. From the reliable 139.5391 model to the advanced 139.18152 and 315 series‚ each model is engineered for durability and performance. The 1/2 HP and 3/4 HP motors cater to single and double garage doors‚ respectively‚ while the belt-drive systems ensure quiet operation. Additionally‚ models equipped with MyQ smart technology provide smartphone app control for enhanced convenience. Whether you prefer traditional chain-drive or modern belt-drive systems‚ Craftsman garage door openers are built to deliver consistent and efficient performance. This manual covers the key features and specifications of these models‚ helping you make an informed choice for your garage needs.

Safety Precautions and Warnings
Always follow safety guidelines to avoid accidents. Ensure proper installation‚ use recommended tools‚ and be cautious with electrical components. Keep the area clear and never operate the door unattended.
2.1 General Safety Guidelines
Always adhere to safety guidelines to ensure safe operation of your Craftsman garage door opener. Wear protective gear during installation and maintenance. Ensure the garage door is properly balanced and aligned before use. Keep the area around the door clear of obstacles and children. Never operate the door while standing under it or when it is moving. Avoid using the opener during power outages or storms. Follow all instructions in the manual and manufacturer warnings. Regularly inspect components like springs and cables for wear. Failure to comply with these guidelines may result in injury or damage. Safety should always be your top priority when working with or using your garage door opener system.
2.2 Specific Warnings for Installation and Operation
When installing or operating your Craftsman garage door opener‚ ensure the opener is used only with sectional doors‚ as specified in the manual. Always operate the opener at 120V‚ 60 Hz to prevent damage or malfunction. Avoid cutting into wires during remote programming‚ as this can void the warranty. Never operate the door during power outages or if the safety sensors are misaligned. Ensure the door is balanced and properly aligned before use. Specific models‚ such as the E Series‚ may require additional precautions. Refer to the manual for model-specific instructions. Failure to follow these warnings may result in damage or injury. Always fasten the manual near the garage door for quick access during emergencies or adjustments.
2.3 Safety Features of the Garage Door Opener
The Craftsman garage door opener is equipped with advanced safety features to protect users and their property. These include safety sensors that detect obstacles and stop the door from closing if something is in its path. The opener also features an emergency release handle‚ allowing manual operation during power outages. Additionally‚ MyQ smart technology provides real-time notifications and control via a smartphone app‚ ensuring you can monitor and manage your garage door securely. LED lighting on certain models enhances visibility‚ and automatic shutdown prevents overheating. These features work together to create a safer and more reliable garage door system‚ minimizing risks and ensuring smooth operation.
Installation Instructions
This chapter provides a step-by-step guide for installing your Craftsman garage door opener‚ ensuring proper assembly and safe operation. Gather necessary tools and materials‚ assemble the rail system‚ mount the opener‚ and install safety sensors and door controls. Follow instructions carefully to ensure smooth functionality and safety.
3.1 Tools and Materials Needed
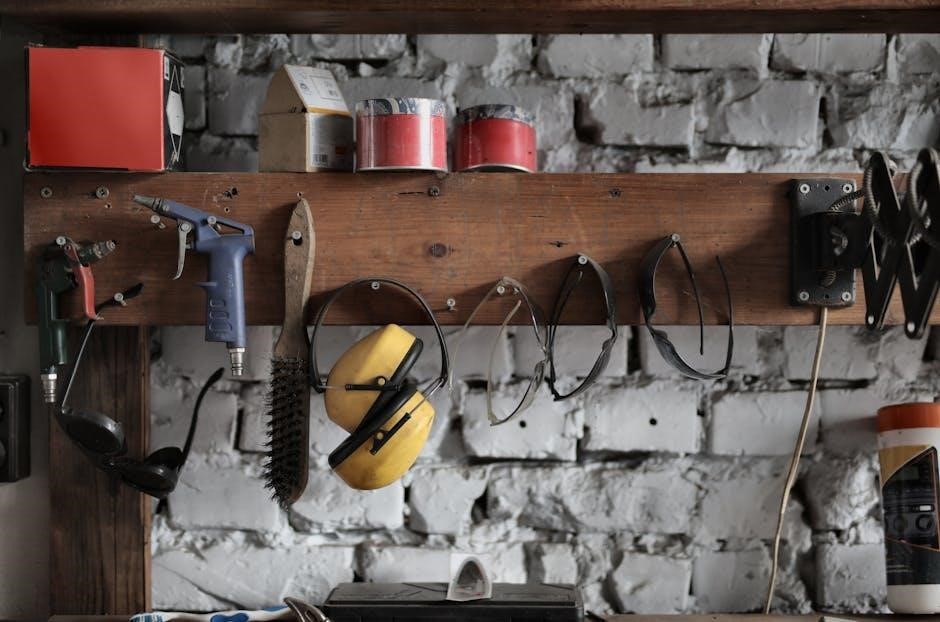
To install your Craftsman garage door opener‚ gather the necessary tools and materials. You’ll need a ladder‚ screwdrivers (Phillips and flathead)‚ wrenches‚ pliers‚ and a tape measure. Additional materials include lag screws‚ wall anchors‚ and a drill with bits. Ensure you have the entire opener kit‚ including the rail‚ motor‚ and door control. Safety gear like gloves and safety glasses is recommended. Organize all components and tools before starting to streamline the process. Refer to the manual for specific hardware requirements‚ as some models may include additional parts. Proper preparation ensures a smooth and efficient installation.
3.2 Step-by-Step Assembly of the Rail System
Begin by unpacking and organizing all rail components. Attach the motor unit to the rail assembly‚ ensuring proper alignment. Secure the idler pulleys and end caps to the rail ends. Next‚ connect the rail sections‚ tightening the bolts firmly. Align the rail with the motor’s output shaft and attach it securely. Ensure the rail is straight and level‚ as misalignment can affect performance. Once assembled‚ measure and adjust the rail length to fit your garage door. Double-check all connections for stability. Finally‚ attach the rail to the motor unit and test the system by manually moving the door to ensure smooth operation. Always follow safety guidelines during assembly.
3.3 Mounting the Garage Door Opener
Mounting the garage door opener requires careful planning and precision. Begin by locating the center of your garage door and mark the spot for the opener’s bracket. Use a drill and screws to secure the mounting bracket to the ceiling. Ensure the bracket is level and sturdy to support the opener’s weight. Next‚ attach the motor unit to the bracket‚ following the manufacturer’s alignment instructions. Tighten all bolts firmly to prevent any movement. Finally‚ connect the rail system to the motor‚ ensuring it is properly seated and aligned with the door. Double-check all connections for stability and test the opener by manually lifting the door to confirm smooth operation. Always follow safety guidelines during installation.
3.4 Installing the Door Control and Safety Sensors
Installing the door control and safety sensors is crucial for safe and efficient operation. Begin by mounting the wall button approximately 5 feet above the floor near the garage entrance. Connect the wires from the opener to the button‚ ensuring proper polarity. Next‚ install the safety sensors on either side of the garage door‚ about 6 inches above the floor. Align them to face each other directly and secure them with brackets. Use the provided adjustment knobs to fine-tune their alignment until the indicator lights show they are properly connected. Test the sensors by waving an object near them to ensure the opener stops and reverses. This step ensures compliance with safety standards and prevents accidents. Always refer to the manual for specific wiring instructions and sensor placement.

Programming the Garage Door Opener
Programming your Craftsman garage door opener is straightforward. Follow the manual’s step-by-step guide to sync remotes‚ wall buttons‚ and keypads. Ensure compatibility and test functionality after setup.
4.1 Programming the Remote Control
Programming the remote control for your Craftsman garage door opener is a simple process. Start by locating the “Learn” button on the motor unit‚ typically found near the antenna. Press and release this button to enter programming mode. Next‚ press the desired button on your remote control to sync it with the opener. The opener will confirm the connection with a light blink or click. Ensure the remote is within range and test its functionality. For additional remotes‚ repeat the process. Refer to your manual for specific timing and button sequences. This ensures seamless communication between your remote and garage door opener‚ providing convenient access and control; Always verify compatibility with your opener’s frequency‚ such as 315 MHz‚ for proper operation.
4.2 Syncing with Additional Remotes
To sync additional remotes with your Craftsman garage door opener‚ ensure compatibility with the opener’s frequency‚ typically 315 MHz. Press the “Learn” button on the motor unit to enter programming mode. Within 30 seconds‚ press the desired button on the remote to sync it. The opener confirms the connection with a light blink or click. Chamberlain universal remotes can program wirelessly without cutting wires. Always verify compatibility before syncing. After syncing‚ test each remote to ensure functionality. Adjust as needed for reliable performance.
4.3 Programming the Wall Button and Keypad
To program the wall button or keypad for your Craftsman garage door opener‚ locate the “Learn” button on the motor unit. Press and hold it until the indicator light blinks‚ then release to enter programming mode. Within 30 seconds‚ press the wall button or enter the keypad code. The opener will confirm with a light blink or click. Test the button or keypad to ensure it works. Repeat for additional buttons or codes if needed. Programming ensures seamless control and convenience for operating your garage door. Always refer to the manual if issues arise during setup. This step ensures your wall button and keypad function properly with your opener.
Troubleshooting Common Issues
Identify and resolve issues like remote connectivity problems‚ sensor misalignment‚ or motor malfunctions. Check for obstructions‚ ensure sensors are clean‚ and consult the manual for detailed solutions.
5.1 Identifying and Solving Operational Problems
Start by checking if the garage door is properly aligned and free from obstructions. Ensure the sensors are clean and correctly aligned‚ as misalignment can prevent the door from operating. If the door doesn’t open or close‚ verify that the remote control or wall button is functioning correctly. Consult the manual for error codes or LED light patterns that indicate specific issues. If the door operates erratically‚ inspect the rail system for damage or misalignment. For unusual noises‚ lubricate moving parts or tighten loose screws. If the motor doesn’t respond‚ check the power supply and circuit breaker. Refer to the troubleshooting section for detailed solutions to address these common operational problems effectively.
5.2 Fixing Remote Control Connectivity Issues
If your remote control isn’t working‚ start by replacing the batteries and ensuring they are installed correctly. Check for any obstructions between the remote and the garage door opener. Verify that the remote is properly synced with the opener by reprogramming it using the steps in the manual. Press and hold the learn button on the opener until the LED blinks‚ then press the remote button within 30 seconds. If the issue persists‚ test the remote near the opener to rule out signal strength problems. For universal remotes‚ ensure compatibility with your opener’s frequency. If connectivity issues remain‚ reset the opener or consult the troubleshooting guide for further assistance. Always refer to the manual for specific instructions tailored to your model.
5.3 Resolving Sensor Alignment Problems
Ensure the safety sensors are properly aligned and free from obstructions. Clean the sensors with a soft cloth to remove dirt or debris. Check the LED indicators on the sensors; a steady light indicates proper alignment‚ while a blinking light signals misalignment. If misaligned‚ gently adjust the sensor brackets to align them correctly. Secure the brackets tightly after adjustment. Test the door operation by closing it slowly to ensure the sensors detect obstacles. If issues persist‚ consult the manual for specific recalibration steps or reset the sensors according to the manufacturer’s instructions. Proper sensor alignment is crucial for safe and reliable operation of your garage door opener. Always refer to the manual for model-specific guidance.
5.4 Addressing Motor and Gears Malfunction
If your garage door opener’s motor or gears malfunction‚ start by checking for unusual noises or jerky movements. Ensure the motor is not overloaded and that gears are properly aligned. Inspect for wear and tear‚ and disconnect power before examining internal components. Lubricate moving parts if necessary‚ and clear any blockages. If gears are damaged‚ replace them with compatible parts. For complex issues‚ consult a professional. Regular maintenance‚ such as lubricating gears and inspecting belts‚ can prevent future malfunctions. Always refer to the manual for specific instructions tailored to your Craftsman model. Addressing motor and gear problems promptly ensures smooth and reliable operation of your garage door opener.
Maintenance and Repair Tips
Regular lubrication of moving parts ensures smooth operation. Inspect and replace worn components promptly. Check door balance and alignment for optimal performance. Schedule annual professional inspections for long-term reliability.
6.1 Regular Maintenance Schedule
A well-structured maintenance schedule is crucial for the longevity of your Craftsman garage door opener. Begin by monthly inspecting the door’s balance and alignment to prevent uneven wear. Every three months‚ lubricate the rollers‚ hinges‚ and springs with a silicone-based spray to ensure smooth operation. Additionally‚ clean the sensors and tracks to avoid obstructions. Annually‚ examine the opener’s motor and gears for signs of wear and tear. Replace any worn-out parts promptly to maintain efficiency. Schedule a professional inspection every two years to address complex issues. By adhering to this schedule‚ you can prevent major repairs and ensure consistent performance over time.
6.2 Lubricating Moving Parts
Lubricating the moving parts of your Craftsman garage door opener is essential for maintaining smooth operation and extending its lifespan. Start by identifying components such as rollers‚ hinges‚ and springs‚ which are prone to friction and wear. Use a high-quality silicone-based spray lubricant‚ as it resists dust and dirt accumulation. Apply a light coat to each moving part‚ ensuring even coverage. Avoid using grease or oil‚ as they can attract debris and clog the system. Repeat this process every three to six months or when you notice increased noise or resistance. Proper lubrication prevents excessive strain on the motor and ensures quiet‚ efficient performance. Regular lubrication is a simple yet critical step in maintaining your garage door opener’s functionality and longevity.
6.3 Inspecting and Replacing Worn-Out Components
Regular inspection of your Craftsman garage door opener’s components is crucial for ensuring reliability and safety. Check the springs‚ rollers‚ and hinges for signs of wear‚ rust‚ or damage. If you notice excessive noise or slow operation‚ it may indicate worn parts. Replace any damaged components immediately to prevent further damage or malfunction. Use original Craftsman replacement parts for compatibility and durability. Always disconnect power before performing inspections or replacements. Lubricate new parts according to the manufacturer’s recommendations. Regular inspections and timely replacements prevent accidents and ensure smooth‚ efficient operation. Keep your garage door opener in optimal condition by addressing worn-out components promptly.

Advanced Features and Smart Technology
The Craftsman garage door opener integrates advanced features like MyQ smart technology‚ enabling smartphone app control and compatibility with smart home systems for enhanced convenience and remote access.
7.1 Understanding MyQ Smart Technology
MyQ smart technology is a cutting-edge feature in Craftsman garage door openers‚ enabling seamless integration with your smartphone and smart home systems. This innovative technology allows users to monitor and control their garage door from anywhere via the MyQ app. With real-time notifications‚ you can receive alerts when your garage door is opened or closed‚ ensuring added security. MyQ also supports voice commands through Amazon Alexa and Google Assistant‚ offering hands-free operation. The system is compatible with various Craftsman models and provides a user-friendly interface for customizing settings. By enhancing convenience and security‚ MyQ smart technology transforms your garage door opener into a modern‚ connected device.
7.2 Integrating with Smart Home Systems
Craftsman garage door openers seamlessly integrate with popular smart home systems like Amazon Alexa and Google Assistant‚ enhancing your home automation experience. Using the MyQ app‚ you can link your garage door opener to these platforms‚ enabling voice commands for operation. This integration allows you to control your garage door alongside other smart devices‚ creating a unified smart home ecosystem. Additionally‚ the MyQ app provides real-time notifications and remote monitoring‚ ensuring you stay informed about your garage door’s status. The setup process is straightforward‚ with no additional hardware required‚ making it easy to elevate your garage door opener’s functionality. This integration boosts convenience and security‚ offering a modern solution for tech-savvy homeowners.
7.3 Using the Smartphone App for Remote Control
The MyQ smartphone app empowers users to control their Craftsman garage door opener remotely‚ offering unparalleled convenience. Through the app‚ you can open‚ close‚ or check the status of your garage door from anywhere. Real-time notifications alert you to any door activity‚ ensuring security and peace of mind. The app also allows scheduling of automatic operations‚ so your garage door opens or closes at set times. Compatibility with both iOS and Android devices ensures widespread accessibility. Additionally‚ the app provides a history log of door activities‚ helping you monitor usage patterns. This feature-rich tool enhances your garage door opener’s functionality‚ making it an indispensable part of your daily routine and home security system.
Accessories and Compatibility
Explore a range of accessories‚ including remotes‚ keypads‚ and smart technology integrations‚ designed to enhance your Craftsman garage door opener’s functionality. Ensure compatibility with Craftsman products for seamless performance and convenience.
8.1 Recommended Accessories for Enhanced Functionality
To maximize the performance of your Craftsman garage door opener‚ consider these recommended accessories. A remote control provides convenient operation from a distance‚ while a keypad offers keyless entry for added security. Smart technology integrations‚ such as the MyQ app‚ enable remote monitoring and control via your smartphone. Additionally‚ belt drive systems reduce noise for quieter operation‚ and compatibility with Craftsman’s universal receivers ensures seamless integration with other devices. Accessories like door sensors enhance safety by preventing accidents‚ while extension kits and rail systems accommodate larger or specialized garage doors. These accessories not only enhance functionality but also improve the overall user experience‚ ensuring your garage door opener meets your specific needs and preferences.
8.2 Compatibility with Other Craftsman Products
Your Craftsman garage door opener is designed to work seamlessly with a range of Craftsman products‚ ensuring a cohesive and integrated system. Compatibility extends to Craftsman’s smart home systems‚ allowing you to control your garage door opener alongside other devices. Additional remotes and universal receivers are fully compatible‚ enabling easy expansion of your system. The MyQ smart technology integrates perfectly with Craftsman products‚ providing a unified experience. Optional expansion kits and accessories‚ such as keyless entry pads and smart sensors‚ are also designed to work flawlessly with your garage door opener. This compatibility ensures enhanced functionality and a streamlined user experience‚ making it easy to customize your setup to meet your needs.

Warranty and Customer Support
Craftsman offers a comprehensive warranty for garage door openers‚ covering parts and labor for a specified period. Dedicated customer support is available for troubleshooting and assistance. Refer to the manual for detailed warranty terms and contact information to ensure your product is protected and supported throughout its lifespan.
9.1 Understanding the Warranty Terms
The Craftsman garage door opener is backed by a comprehensive warranty that covers parts and labor for a specified period. The warranty ensures protection against defects in materials and workmanship‚ providing peace of mind for users. It is essential to review the terms and conditions outlined in the manual to understand what is covered and for how long. Registration of the product may be required to activate the warranty. Exceptions‚ such as normal wear and tear or improper installation‚ are typically excluded; For detailed information‚ refer to the warranty section in the manual or visit the Craftsman website. Proper documentation and proof of purchase are often necessary for warranty claims.
9.2 Contacting Craftsman Customer Service
For assistance with your Craftsman garage door opener‚ contact customer service through the official website or toll-free number. Visit the Craftsman website for detailed support options‚ including live chat‚ email‚ or phone assistance. When reaching out‚ have your product serial number and purchase details ready for efficient service. Representatives are available to address inquiries‚ troubleshooting‚ and warranty-related matters. Additionally‚ the website offers a comprehensive FAQ section and downloadable resources‚ such as manuals and repair guides‚ to help resolve common issues independently. Craftsman customer service aims to provide timely and effective solutions to ensure your garage door opener operates smoothly and meets your expectations.
Thank you for taking the time to review this comprehensive guide to your Craftsman Garage Door Opener. This manual has provided detailed instructions for installation‚ programming‚ troubleshooting‚ and maintenance to ensure optimal performance. By following the outlined steps and adhering to safety guidelines‚ you can enjoy the convenience and reliability of your garage door opener. Regular maintenance and proper care will extend the lifespan of your system. If you encounter any issues or have further questions‚ refer to the troubleshooting section or contact Craftsman customer support for assistance. This manual serves as a valuable resource to help you maximize the functionality and efficiency of your garage door opener for years to come.
Frequently Asked Questions (FAQs)
Here are some common questions and answers to help you with your Craftsman Garage Door Opener:
- Q: How do I program my remote control? A: Refer to Section 4 for step-by-step programming instructions.
- Q: Why isn’t my garage door closing properly? A: Check sensor alignment and ensure no obstacles are blocking the door path.
- Q: Can I use my opener with a smart home system? A: Yes‚ many models support integration with smart home systems using MyQ technology.
- Q: How often should I lubricate the moving parts? A: Lubricate every 6 months to maintain smooth operation.
- Q: Where can I find replacement parts? A: Visit the official Craftsman website or contact customer support.
For more detailed information‚ refer to the relevant sections of this manual or contact Craftsman customer service.